The Tech Artist
One man's blunderings into the 3D realm
Project maintained by Derfies Hosted on GitHub Pages — Theme by mattgraham
Full Pipeline Test
03 Jan 2012 -
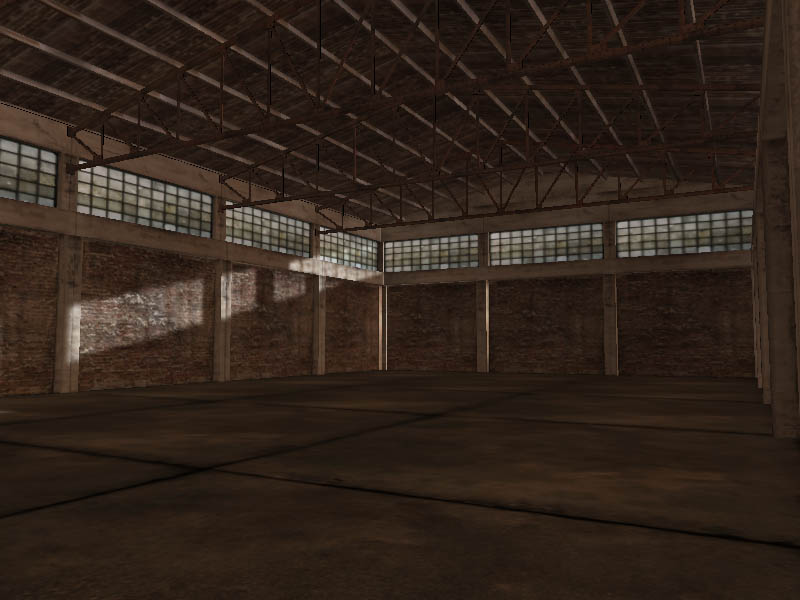
I’ve finally completed a full test of my pipeline, from creating the assets in Maya and Photoshop through to deployment on a webpage. There’s been a number of small issues I’ve had to solve along the way, and I hope to outline some of these in this post. The finished real time warehouse scene can be viewed here (you will be asked to approve a certificate saying that you allow my code to run on your computer after installing the plugin).
Asset Creation
When creating assets I often make use of Maya’s instancing feature. This works well aside from two main issues: the first being that each instance can have its own texture assignment. While I can think of ways where this might be useful, it tends to slow me down as I have to assign the shader to each instanced piece. Perhaps I should switch to the referencing system, but I’ve been bitten by it in the past so I’m probably going to try and avoid it.
The other issue with instances comes when applying a lightmap to the model. In order to get a good UV atlas for the lightmap Maya expects it to be one model; you can use automatic mapping across multiple nodes but Maya won’t lay the resulting shells out without overlap. It’s not a big deal to combine all the meshes together at this stage, but trying to combine a model with instanced pieces doesn’t work too well – they just tend to vanish. If Maya has a “make instance unique” feature then I haven’t found it yet, and if this feature doesn’t exist it would be trivial to write one.
Something else which takes up a lot of time is setting up shaders for lightmapping, then setting them up again for export. The Panda3D export plugin expects shaders to be set up a certain way (Maya Phong materials), and this is typically quite different to the setup I’m using to produce a nice lightmap (mia materials). Once the lightmaps are generated they have to be plugged into the Phong shader using a layered texture, which can be time consuming. I’m planning on automating this shader setup with a couple of MEL scripts to help remove the time between iterations.
Scene Layout and Packing for Deployment with PackP3D
This was the first time using the editor which I have been writing to actually publish something, and a few bugs have started to show. Overall though I was quite happy with the way it worked, although admittedly I was only using it to place a single model and player starting position.
Firstly, the map format writes full paths to the egg models in the xml, which breaks if you then pack / move the project. I’ll have to use relative paths if I don’t want to have to fix the xml before packing. The packing process also builds .bam files for all the .egg models, so I’ll need to change this extension too before packing if the models are to be found.
I also found out the hard way that cElementTree is not supported by the PackP3D process. I suppose this is because cElementTree is implemented in C (and is therefore faster – the main reason why I chose to use it) and relies on a bunch of .lib files located in python\libs. These don’t seem to get packed and aren’t found at runtime. This is trivial to fix however, as it’s easy enough to change:
import xml.etree.cElementTree
to:
import xml.etree.ElementTree
I also had some trouble building some of my modules. I have a helper model which contains a lot of useful snippets and classes – including the wx classes I’m using to build the editor. If I try to pack the project without manually specifying to include the wx modules the resulting p3d file will complain about the missing module. I can include the wx modules but this seems to add bloat to the final file, or at least force the end user to download extra modules. Commenting out any imports which were bringing in wx modules will fix this, but it’s not a long term solution.
Lastly, in order to pack something and release it on the web you must bundle a certificate into your p3d file. This is basically a way where users can identify who is running code on their computer. I created mine using the OS X key chain utility, which made it very easy to create a self-signed certificate using the terminal.